
If you find yourself repeating the same commands over and over in TextMate, it’s relatively straightforward to create your own bundle. Recently I’ve been migrating a bunch of blog posts from WordPress to Jekyll, and found myself repeating the same tasks again and again :
- Replacing opening <code lang=“xyz”> tags with {% highlight xyz %} tags.
- Replacing closing </code> tags with {% endhighlight %} tags.
- Replacing the old link format "link text":http://link-url/ with the new one {{ “link-url” | ext_link: “link text” }}
These changes were to support the Pygments syntax highlighter used by Jekyll, and to add a custom jekyll plugin (ext_link) to format external links. This seems like a good candidate for automation, so let’s get started!
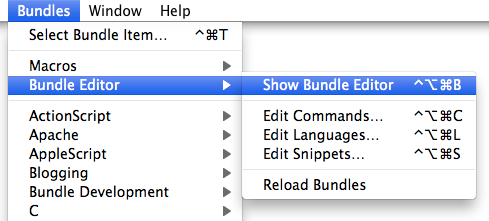
Go to Bundles -> Bundle Editor -> Show Bundle Editor, which will launch the editor window.
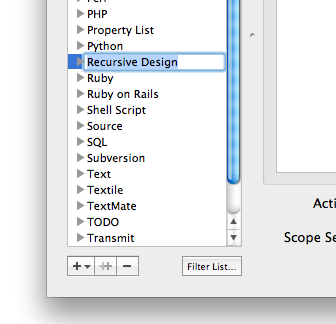
Click the + button at the bottom left of the window, and select New Bundle.

A new bundle will be created in the list. Decide what you want to call it, and enter the name.
With your new bundle highlighted, click the + button at the bottom left once again, and select New Command.
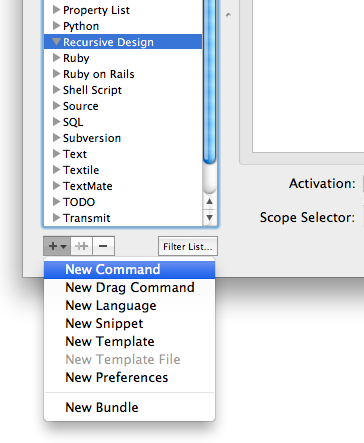
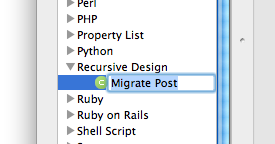
A new command will be created within your bundle - once again, choose a name for it.
The Edit Command window will be pre-populated with an example command. Commands are basically just shell scripts that TextMate runs, so anything you can do in a terminal you can probably do in a TextMate command.
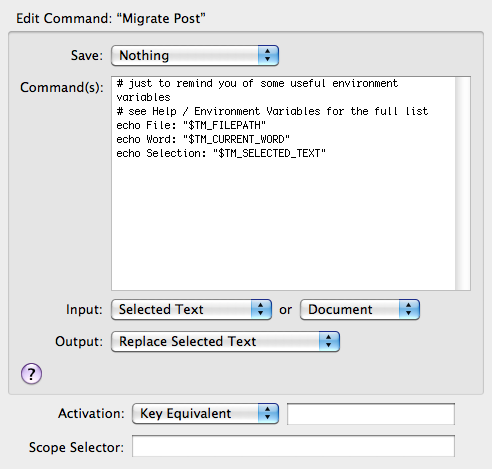
Delete this place-holder text, and add your custom shell command instead.
Let’s have a quick look at how each of these commands work :
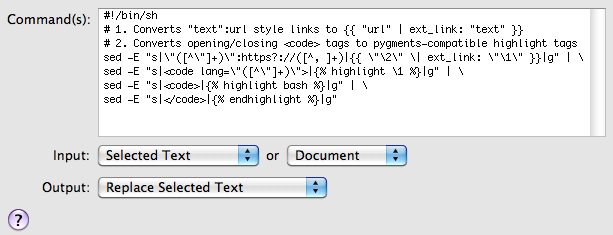
sed -E "s|\"([^\"]+)\":https?://([^, ]+)|{{ \"\2\" \| ext_link: \"\1\" }}|g"
The command above uses sed with extended regex support (the -E option) to search for links in the old link format, and convert them to the new format.
sed -E "s|<code lang=\"([^\"]+)\">|{% highlight \1 %}|g"
The sed command above searches for <code lang=“xyz”> tags, and converts them to the pygments highlight format.
sed -E "s|<code>|{% highlight bash %}|g"
The sed command above searches for <code> tags, and converts them to the pygments highlight format with a default highlighter (I chose bash fairly randomly).
sed -E "s|</code>|{% endhighlight %}|g"
The sed command above replaces closing </code> tags with their pygments equivalents.
Inside the command editor, the commands are actually piped into each other using “| " :
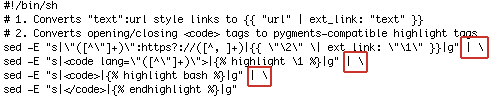
The “|” character tells TextMate to pipe the output of each function into the next one. the “" character simply tells TextMate that the command isn’t finished yet, and to jump to the next line. The final line doesn’t have this backslash, so when TextMate hits the end of this line, it knows it’s time to finish.
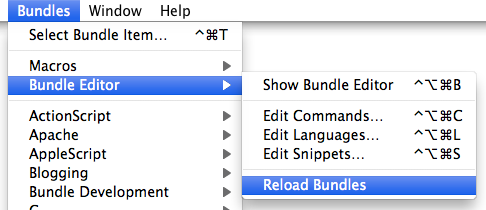
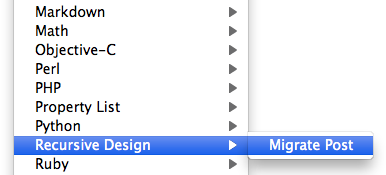
Once you’re satisfied with your command, go to Bundles -> Bundle Editor -> Reload Bundles to activate it :
Once you’ve done this, the bundle should be available in the Bundles list, and your command is ready to use.
If you’d like to check your newly created bundle into version control, or distribute it to someone else, you can find the actual bundle package in ~/Library/Application Support/TextMate/Bundles/.

This post only scratches the surface of the power of bundles - check out the TextMate manual entry and the TextMate wiki for more information.